# 创建一个聊天应用基于 React 和 Hooks
原文地址:https://www.cometchat.com/tutorials/building-a-chat-app-with-react-hooks-a-pragmatic-example/
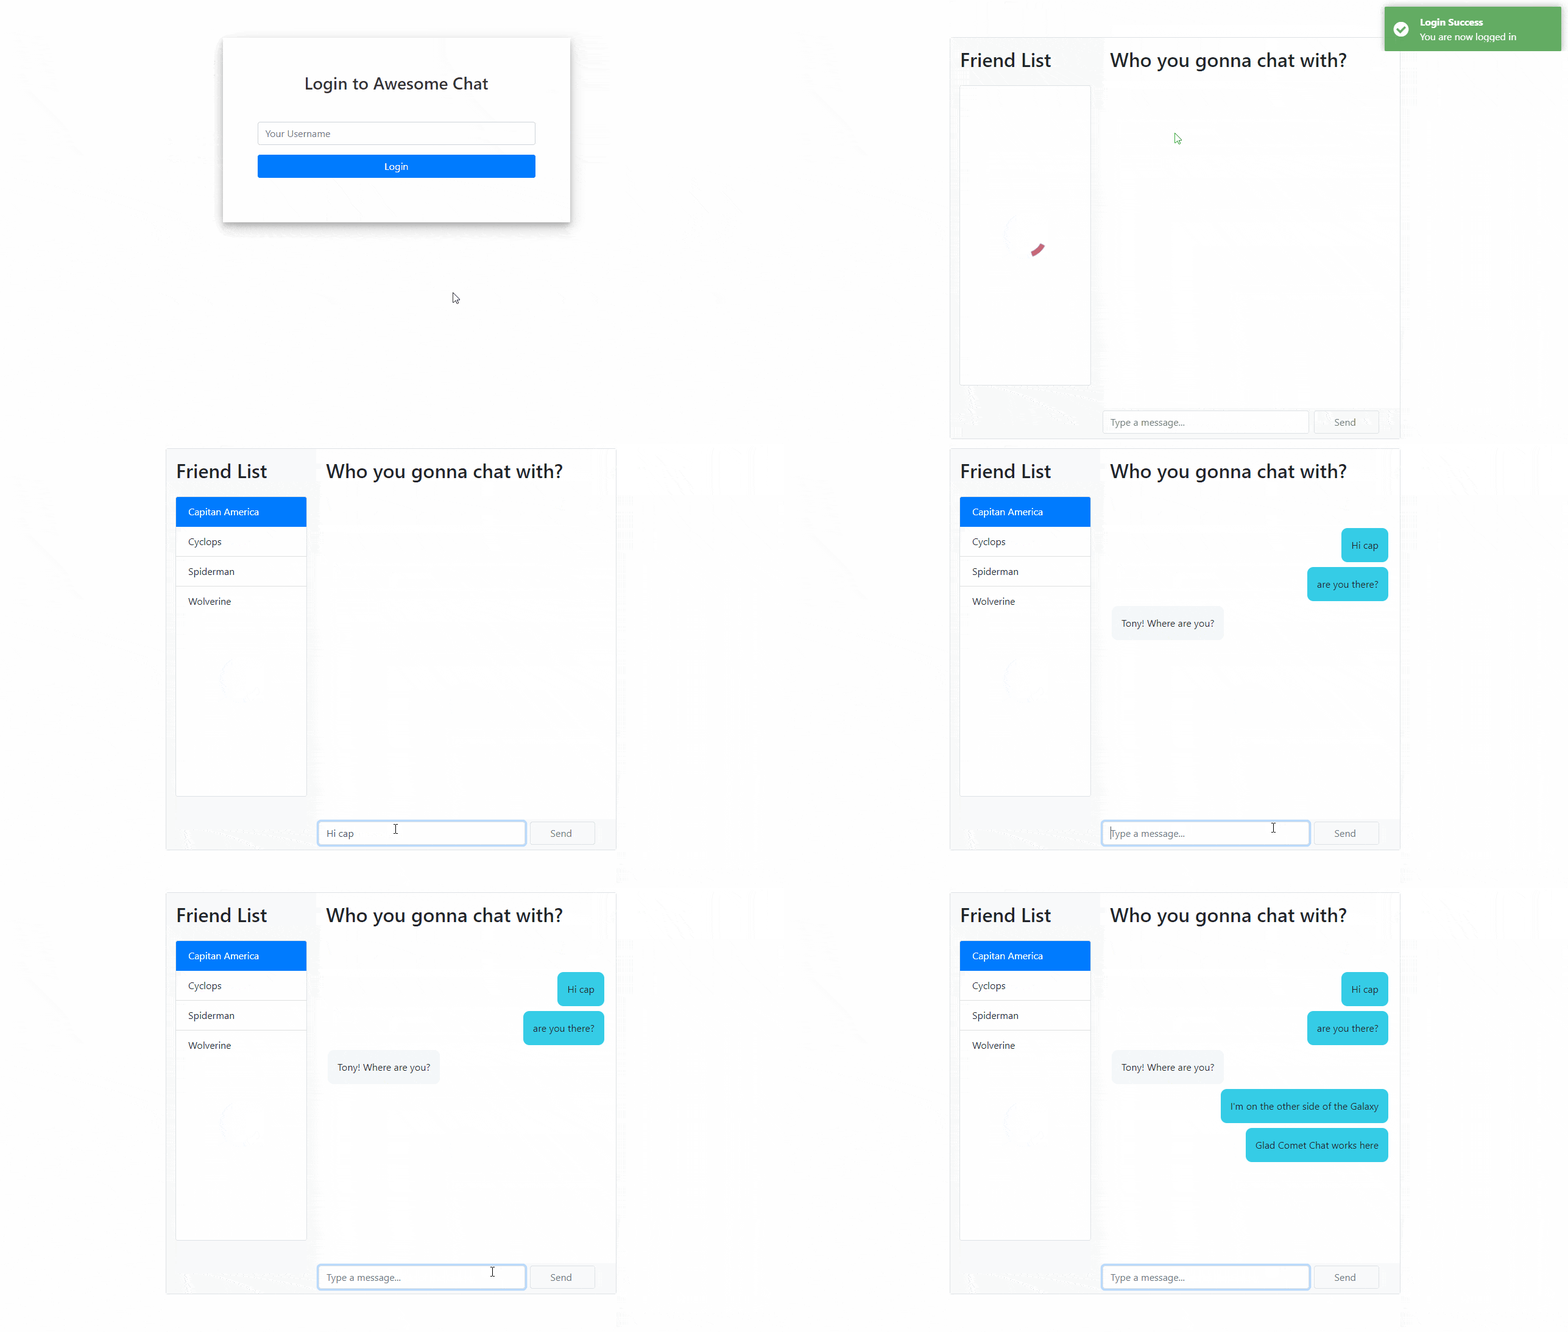
这是一个 react 练手项目,效果图:
# CometChat 概览
我们不需要自己做后端,我们将使用CometChat,它是一个 API,使我们能够轻松地构建实时聊天等通信功能,在我们的例子中,我们将利用 npm 模块进行连接,并开始实时传输消息。
在这之前我们需要创建一个CometChat (opens new window)账户,并创建一个CometChat app
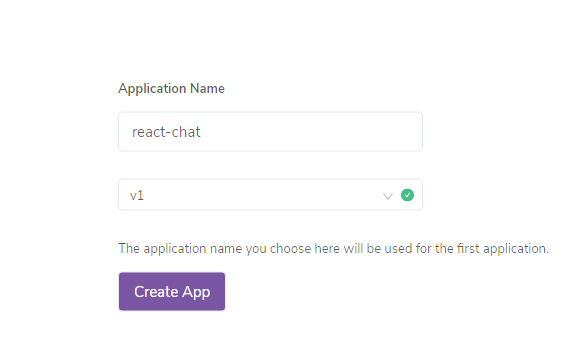
注意:本文章在创建应用时,选择的是 v1 版本
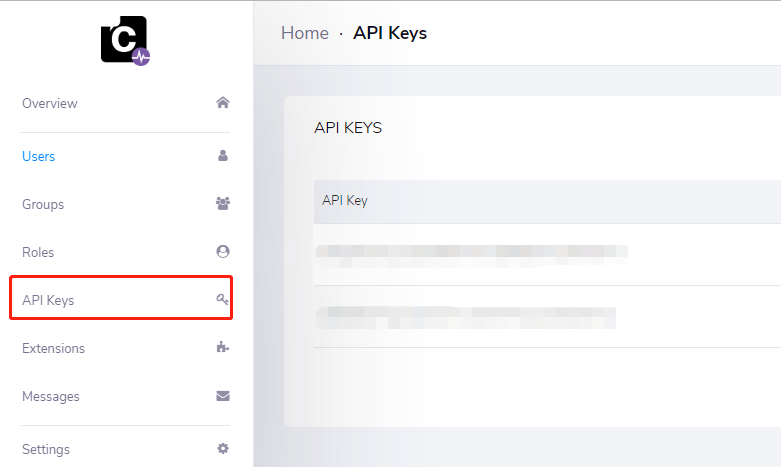
创建之后,进入API Keys,复制自动生成的autoOnly key,我们将在下一步需要它
# 创建 React 项目
打开命令行 blah blah blah🙄
create-react-app react-chat
创建完之后安装以下依赖包:
npm install @cometchat-pro/chat bootstrap react-md-spinner react-notifications
接着删除src文件夹下所有文件:
rm src/*
然后新建一个CometChat的配置文件src/config.js,并抛出给全局使用:
const config = {
  appID: "{Your CometChat Pro App ID here}",
  apiKey: "{Your CometChat Pro Api Key here}"
};
export default config;
下一步,新建一个src/index.js文件,初始化CometChat:
import React from "react";
import ReactDOM from "react-dom";
import { CometChat } from "@cometchat-pro/chat";
import App from "./components/App";
import config from "./config";
CometChat.init(config.appID);
ReactDOM.render(<App />, document.getElementById("root"));
# 编写组件
现在我们创建一个components文件夹用来存放我们的组件,我们的应用将会由 3 个组件组成,App,Login,Chat。
App.js
import React from "react";
const App = () => {
  return <div> This is the App component</div>;
};
export default App;
Login.js
import React from "react";
const Login = () => {
  return <div> This is the Login component</div>;
};
export default Login;
Chat.js
import React from "react";
const Chat = () => {
  return <div> This is the Chat component</div>;
};
export default Chat;
# 创建 App 组件
App 组件主要做的是根据登录状态来显示Chat或者Login
import React, { useState } from "react";
import "bootstrap/dist/css/bootstrap.css";
import "react-notifications/lib/notifications.css";
import "./App.css";
import { NotificationContainer } from "react-notifications";
import Login from "./Login";
import Chat from "./Chat";
const App = () => {
  const [user, setUser] = useState(null);
  const renderApp = () => {
    // Render Chat component when user state is not null
    if (user) {
      return <Chat user={user} />;
    } else {
      return <Login setUser={setUser} />;
    }
  };
  return <div className="container">{renderApp()}</div>;
};
export default App;
现在还没有App.css,我们来创建一个:
.container {
margin-top: 5%;
margin-bottom: 5%;
}
.login-form {
padding: 5%;
box-shadow: 0 5px 8px 0 rgba(0, 0, 0, 0.2), 0 9px 26px 0 rgba(0, 0, 0, 0.19);
}
.login-form h3 {
text-align: center;
color: #333;
}
.login-container form {
padding: 10%;
}
.message {
overflow: hidden;
}
.balon1 {
float: right;
background: #35cce6;
border-radius: 10px;
}
.balon2 {
float: left;
background: #f4f7f9;
border-radius: 10px;
}
# 创建 Login 组件
Login组件虽然代码量多了点,但是其实做的事情很简单,这个表单帮助我们登录CometChat,并返回用户信息
import React, { useState } from "react";
import { NotificationManager } from "react-notifications";
import { CometChat } from "@cometchat-pro/chat";
import config from "../config";
const Login = props => {
  const [uidValue, setUidValue] = useState("");
  const [isSubmitting, setIsSubmitting] = useState(false);
  const handleSubmit = event => {
    event.preventDefault();
    setIsSubmitting(true);
    CometChat.login(uidValue, config.apiKey).then(
      User => {
        NotificationManager.success("You are now logged in", "Login Success");
        console.log("Login Successful:", { User });
        props.setUser(User);
      },
      error => {
        NotificationManager.error("Please try again", "Login Failed");
        console.log("Login failed with exception:", { error });
        setIsSubmitting(false);
      }
    );
  };
  return (
    <div className="row">
      <div className="col-md-6 login-form mx-auto">
        <h3>Login to Awesome Chat</h3>
        <form className="mt-5" onSubmit={handleSubmit}>
          <div className="form-group">
            <input
              type="text"
              name="username"
              className="form-control"
              placeholder="Your Username"
              value={uidValue}
              onChange={event => setUidValue(event.target.value)}
            />
          </div>
          <div className="form-group">
            <input
              type="submit"
              className="btn btn-primary btn-block"
              value={`${isSubmitting ? "Loading..." : "Login"}`}
              disabled={isSubmitting}
            />
          </div>
        </form>
      </div>
    </div>
  );
};
export default Login;
运行npm run start我们看一下效果
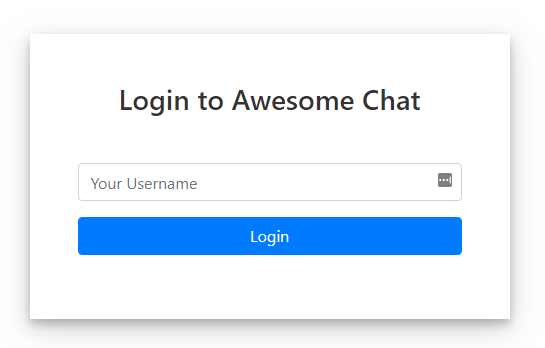
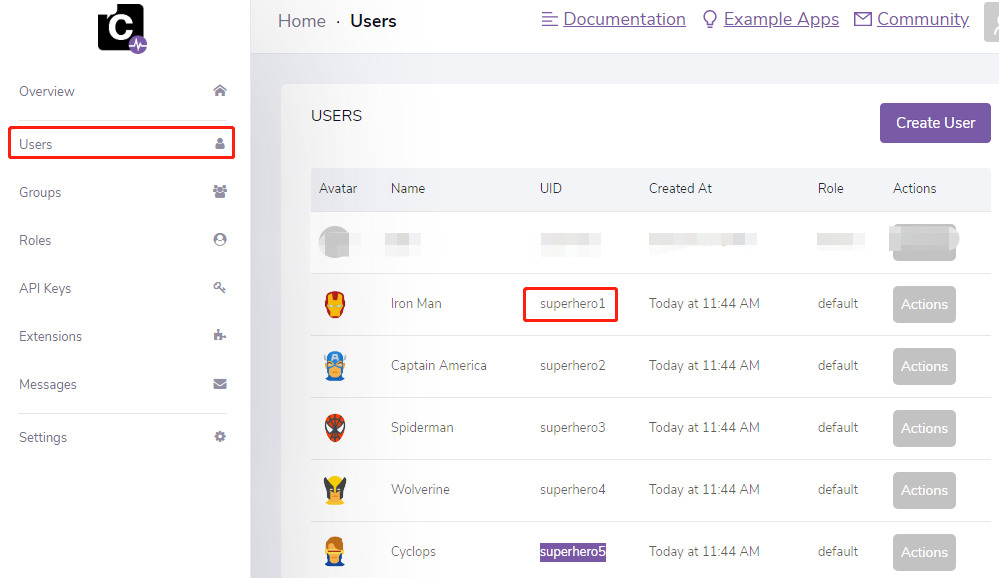
这个username不是的我们注册用户名,而是菜单>Users 中用户的UID
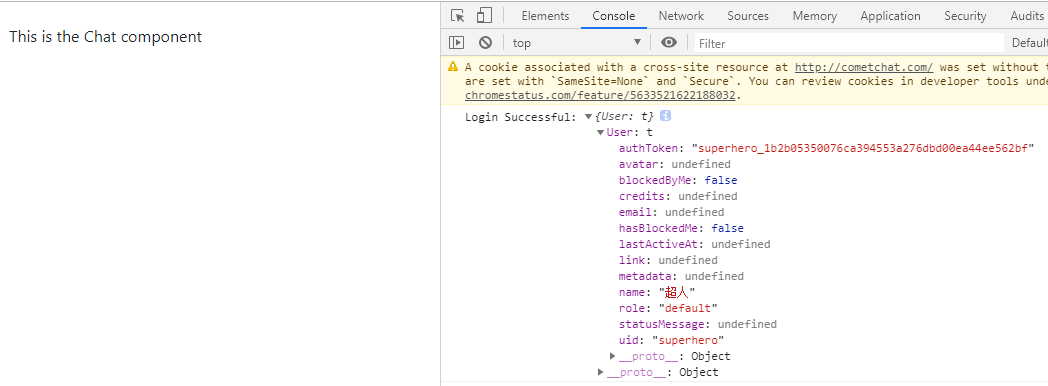
登录成功后我们来看一下返回值:
# 创建 Chat 组件
在Chat组件中,我们需要的功能:
- 选择朋友聊天
- 查看他们的历史聊天记录
- 发送新消息
- 实时接收响应
需要的 state:
friends保存可供聊天的用户列表selectedFriend保存当前聊天的用户chat保存朋友之间发送和接收的聊天消息数组chatIsLoading获取聊天数据时显示 loadingfriendIsLoading获取朋友时显示 loadingmessage提供给消息输入控制组件
接下来我们开始编写Chat组件:
import React, { useState, useEffect } from "react";
import MDSpinner from "react-md-spinner";
import { CometChat } from "@cometchat-pro/chat";
const MESSAGE_LISTENER_KEY = "listener-key";
const limit = 30;
const Chat = ({ user }) => {
  const [friends, setFriends] = useState([]);
  const [selectedFriend, setSelectedFriend] = useState(null);
  const [chat, setChat] = useState([]);
  const [chatIsLoading, setChatIsLoading] = useState(false);
  const [friendisLoading, setFriendisLoading] = useState(true);
  const [message, setMessage] = useState("");
  useEffect(() => {
    // this useEffect will fetch all users available for chat
    // only run on mount
    let usersRequest = new CometChat.UsersRequestBuilder()
      .setLimit(limit)
      .build();
    usersRequest.fetchNext().then(
      userList => {
        console.log("User list received:", userList);
        setFriends(userList);
        setFriendisLoading(false);
      },
      error => {
        console.log("User list fetching failed with error:", error);
      }
    );
    return () => {
      CometChat.removeMessageListener(MESSAGE_LISTENER_KEY);
      CometChat.logout();
    };
  }, []);
  useEffect(() => {
    // will run when selectedFriend variable value is updated
    // fetch previous messages, remove listener if any
    // create new listener for incoming message
    if (selectedFriend) {
      let messagesRequest = new CometChat.MessagesRequestBuilder()
        .setUID(selectedFriend)
        .setLimit(limit)
        .build();
      messagesRequest.fetchPrevious().then(
        messages => {
          setChat(messages);
          setChatIsLoading(false);
          scrollToBottom();
        },
        error => {
          console.log("Message fetching failed with error:", error);
        }
      );
      CometChat.removeMessageListener(MESSAGE_LISTENER_KEY);
      CometChat.addMessageListener(
        MESSAGE_LISTENER_KEY,
        new CometChat.MessageListener({
          onTextMessageReceived: message => {
            console.log("Incoming Message Log", { message });
            if (selectedFriend === message.sender.uid) {
              setChat(prevState => [...prevState, message]);
            }
          }
        })
      );
    }
  }, [selectedFriend]);
  return (
    <div className="container-fluid">
      <div className="row">
        <div className="col-md-2" />
        <div className="col-md-8 h-100pr border rounded">
          <div className="row">
            <div
              className="col-lg-4 col-xs-12 bg-light"
              style={{ height: 658 }}
            >
              <div className="row p-3">
                <h2>Friend List</h2>
              </div>
              <div
                className="row ml-0 mr-0 h-75 bg-white border rounded"
                style={{ height: "100%", overflow: "auto" }}
              >
                <FriendList
                  friends={friends}
                  friendisLoading={friendisLoading}
                  selectedFriend={selectedFriend}
                  selectFriend={selectFriend}
                />
              </div>
            </div>
            <div
              className="col-lg-8 col-xs-12 bg-light"
              style={{ height: 658 }}
            >
              <div className="row p-3 bg-white">
                <h2>Who you gonna chat with?</h2>
              </div>
              <div
                className="row pt-5 bg-white"
                style={{ height: 530, overflow: "auto" }}
              >
                <ChatBox
                  chat={chat}
                  chatIsLoading={chatIsLoading}
                  user={user}
                />
              </div>
              <div
                className="row bg-light"
                style={{ bottom: 0, width: "100%" }}
              >
                <form className="row m-0 p-0 w-100" onSubmit={handleSubmit}>
                  <div className="col-9 m-0 p-1">
                    <input
                      id="text"
                      className="mw-100 border rounded form-control"
                      type="text"
                      onChange={event => {
                        setMessage(event.target.value);
                      }}
                      value={message}
                      placeholder="Type a message..."
                    />
                  </div>
                  <div className="col-3 m-0 p-1">
                    <button
                      className="btn btn-outline-secondary rounded border w-100"
                      title="Send"
                      style={{ paddingRight: 16 }}
                    >
                      Send
                    </button>
                  </div>
                </form>
              </div>
            </div>
          </div>
        </div>
      </div>
    </div>
  );
};
const ChatBox = props => {
  const { chat, chatIsLoading, user } = props;
  if (chatIsLoading) {
    return (
      <div className="col-xl-12 my-auto text-center">
        <MDSpinner size="72" />
      </div>
    );
  } else {
    return (
      <div className="col-xl-12">
        {chat.map(chat => (
          <div key={chat.id} className="message">
            <div
              className={`${
                chat.receiver !== user.uid ? "balon1" : "balon2"
              } p-3 m-1`}
            >
              {chat.text}
            </div>
          </div>
        ))}
        <div id="ccChatBoxEnd" />
      </div>
    );
  }
};
const FriendList = props => {
  const { friends, friendisLoading, selectedFriend } = props;
  if (friendisLoading) {
    return (
      <div className="col-xl-12 my-auto text-center">
        <MDSpinner size="72" />
      </div>
    );
  } else {
    return (
      <ul className="list-group list-group-flush w-100">
        {friends.map(friend => (
          <li
            key={friend.uid}
            className={`list-group-item ${
              friend.uid === selectedFriend ? "active" : ""
            }`}
            onClick={() => props.selectFriend(friend.uid)}
          >
            {friend.name}
          </li>
        ))}
      </ul>
    );
  }
};
export default Chat;
# handleSubmit函数
当要发送新信息时,我们可以调用CometChat.sendMessage方法:
const handleSubmit = event => {
  event.preventDefault();
  let textMessage = new CometChat.TextMessage(
    selectedFriend,
    message,
    CometChat.MESSAGE_TYPE.TEXT,
    CometChat.RECEIVER_TYPE.USER
  );
  CometChat.sendMessage(textMessage).then(
    message => {
      console.log('Message sent successfully:', message);
      setChat([...chat, message]);
    },
    error => {
      console.log('Message sending failed with error:', error);
    }
  );
  setMessage('');
};
# scrollToBottom函数
我们的Chat组件已经很不错了,但是还有一个问题,当获取的消息很多时,用户想看到最新的消息必须要手动滑倒最下面才能看到,这时就需要scrollToBottom函数了
const scrollToBottom = () => {
  let node = document.getElementById('ccChatBoxEnd');
  node.scrollIntoView();
};
当message state变更时调用这个方法:
messagesRequest.fetchPrevious().then(
  messages => {
    setChat(messages);
    setChatIsLoading(false);
    scrollToBottom();
  },
  error => {
    console.log('Message fetching failed with error:', error);
  }
);